
A Pickle Autopsy? YES!
If you teach Anatomy & Physiology, you know the struggle of the first unit…. it’s HUGE!! … and jam-packed with things that are absolutely essential for students to know in order to be successful in the course. I usually struggle with finding activities to review the body cavities and directional terms. This year, someone suggested using the pickle autopsy and I’m so glad I did!
The lab I used was published in The Forensic Teacher and would be appropriate for either discipline (I teach both this year). Here is the link to the lab I used http://www.theforensicteacher.com/Labs_files/picklelabsheets.pdf A clever fellow teacher friend came up with the storyline that there was a gang war between the Claussens and the Vlasics in the fridge that resulted in no survivors. I loved it so I also used that storyline to frame my lab.
Set Up– The Basics
Now that I had my lab picked out and my story to tell, I had to figure the logistics of how to get everything set up.
First, the pickles….

I found the big jars of dills at Walmart for $5.97 each. The smaller pickles I got because I wanted some of my “victims” to be pregnant (or they could also be small children pickles lol). I had a hard time estimating how many pickles were in the big jars, but these 2 had a total of 33 pickles– more than enough for my classes. The picture below shows them separated by “male” and “female” victims (my “male” pickles are the ones with the stems lol).


Here are all the supplies I used for the lab: 
How to make them look like victims….
I glued wiggly eyes onto thumbtacks for their eyes (so I can reuse them)
I also used pellets that go in pellet guns for bullet wounds (I smashed them a little with the hammer first and dipped them into gel food coloring before I stuck them in the “victims”)
I made their heads from an olive stuck on a toothpick– some I even squished so their “brains” fell out a little lol. I also gave all of them a “spine” (a toothpick on the dorsal side just under the skin). I also broke several of the toothpicks so this “injury” might be discovered and included in the story of their “victim”. 
All the “victims” had a bead implanted in the vicinity of their heart. If the bead was red, they had a normal heart. If it was black or dark purple, it represented a heart attack. I found that if you make a slit on the side of the pickle (choose a wrinkle), it will often be completely unnoticeable and students will wonder how in the world you got those beads in there! I also slipped in a small green bead in the neck region of a few of the “victims” and told my students I heard that some of the gang members involved in the war were caught raiding the grapes from the fridge and several choked on them when their leader caught them.
I also told them that the gang members were not healthy and many had various diseases and disorders because they didn’t take care of themselves. Many had white beads implanted in various areas. These beads represented a tumor in the particular area. Knotted pieces of rubber bands in the abdominal region represented parasites. Many had broken toothpick “limbs”. I also had several who were pregnant.


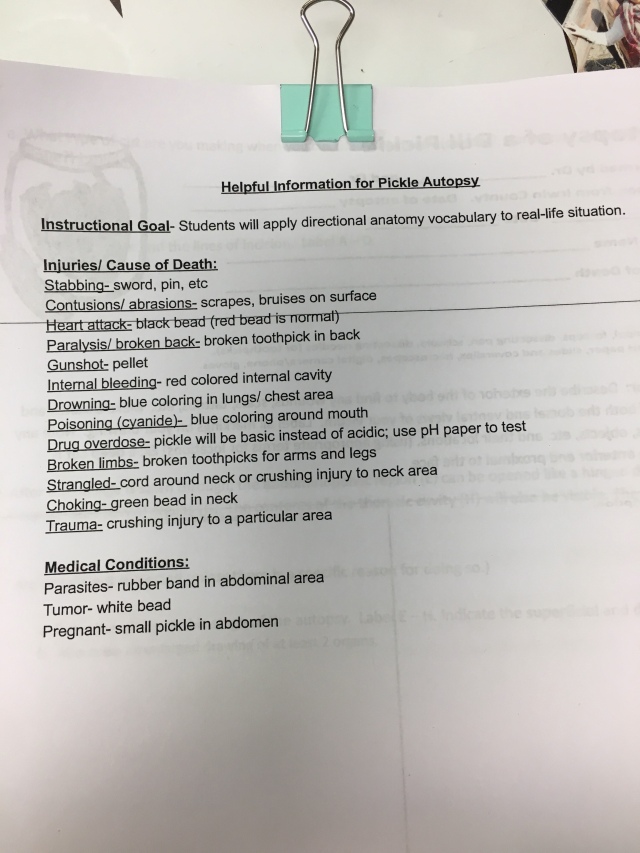
This is the sheet of “Helpful Hints” I gave my students with their lab:
A Snapshot of My “Victims”
I separated my “victims” into 4 general types based on their cause of death:
- Trauma or internal bleeding (Stabbed or gunshot, injected with red food coloring)
- Poisoning/ Drug Overdose (I soaked them in baking soda but didn’t get a very good result)
- Heart Attack (black bead instead of red bead in chest)
- Drowning (blue food coloring injected in chest area)
My “victims” had multiple things that could have resulted in their deaths, but having 4 major things just helped me keep it organized. I also put them in separate dishes while I plotted their demise 🙂 
I also kept them separate in labeled gallon ziplock bags to transport them to school. 
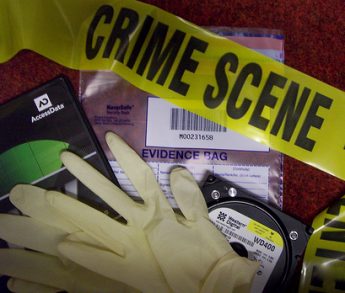
The Lab Set Up
I set my lab up as a mini crime scene. I had some fake vampire blood from my forensics class that I also added to help set the scene. I also added in some extra plastic swords and pellets around the “victims”. (I let my students pick their own “victim” from the scene). 
Group Jobs
Students were in a lab group of 3 per “victim”. In my lab, every student in the group has a specific job and job description. It just helps my lab groups run more smoothly and tends to decrease the possibility that one student does the lion’s share of work. These are the jobs I gave my groups for this lab: 
My Take on the Pickle Autopsy Lab
Would I use it again? Absolutely! My students became very proficient at actually using the directional terminology and identifying the body cavities that we talked about in class. I heard many meaningful conversations within the groups… “That’s a break in his arm that’s intermediate between the shoulder and the elbow” “I think this sword went through the abdominal cavity and not the thoracic cavity”…. This was so much better than hearing them try to memorize a diagram or a chart of the directional terms!
They loved getting into our “gang warfare” story. I had them fill out a Coroner’s Report detailing the abnormalities they found both in, and on their “victim”, as well as the location of these abnormalities. Then, they had to determine the cause of death for their victim, supporting their opinion with specific details from their autopsy. At all times within their report, they had to incorporate correct anatomical terminology. Finally, they had to create a narrative of what happened to their “victim” based on the findings from their autopsy. Several groups shared with the class. It was lots of fun!
A Pickle Autopsy? YES! If you teach Anatomy & Physiology, you know the struggle of the first unit…. it’s HUGE!! … and jam-packed with things that are absolutely essential for students to know in order to be successful in the course. I usually struggle with finding activities to review the body cavities and directional […]
via Autopsy of a Dill Pickle- A Great Introductory Lab for Anatomy or Forensics! — Edgy Instruction
